As technology around us is continually evolving, we often come across the term, ‘Internet of things’. It is a resolutionary technology and is anticipated to be on top of the technological world in the upcoming years. One such important technology which is a part of the iOT is the Raspberry pi-Processor which plays a major role for prototyping a project model, and job easy as it supports python and other cool features .To learn more about all that Raspberry does, you can click here. In the following article, we would basically learn ‘How to make communication with gcloud-IoT core using its MQTT protocol’.
Prerequisite:
- Raspberry pi3
- Micro SD Card -8GB+
- Micro SD card reader
- Keyboard
- Mouse
- Monitor with HDMI port
- DHT22 sensor
- Jumper wires and breadboard
- Python 3+
- Raspbian OS for Raspberry pi
- gcloud account. Along with gcloud-IoT core and Pub/sub API
Raspberry pi set up for MQTT communication:Before undertaking the following steps, you have to complete basic setup for Raspberry:
Step1:Initially, we have to update the libraries existing in the Raspberry pi to deter the future issues. For that run the following command: sudo apt-get update $$ sudo apt-get upgrade
Step 2:Install JWT for the secure connection with IoT core. Security threat is one of the core factors that needs to be considered while undertaking any process in IoT. Authentication is done by JSON Web Token, gcloud-IoT core handles by pyjwt it’s based on the python library called cryptography. Before installing the pyjwt , install the following required libraries to support pyjwt by running this command.
Important pointers to remember: Ensure that you have python 3.x as gcloud released new major version of python client libraries won’t support Python 2.x sudo apt-get install build-essential sudo apt-get install libssl-dev sudo apt-get install python-dev sudo apt-get install libffi-dev
Step 3:Install the pyjwt by running the following command:sudo pip3 install pyjwt
Step 4:To run the pyjwt we need cryptography. For installing the same, you would need to run the following command:sudo pip3 install cryptography
Step 5: Clone the gcloud-community tutorials by following the below commandgit clone https://github.com/GoogleCloudPlatform/community.gitGo to the directory of cloud-iot-gateways-rpi cd community/tutorials/cloud-iot-gateways-rpi
Step 6:If you are working on a different python project you can separate their dependencies one from another by creating a virtual environment. Run the following command to install the virtual environment. pip3 install virtualenv virtualenv env source env/bin/activate
Step 7: Run the following command to install the python libraries where in the directory of requirement.txt file sudo pip3 install -r requirement.txtgcloud setup and configuration:Enable the following API’s Cloud IoT core
Cloud IoT Core for managing devices and gateways. Cloud Pub/sub
Cloud Pub/Sub for managing the device telemetry. Create Registry:Before creating the registry, you need to create project in gcloudPlease follow the link for doing the initial setupCreate a registry:Create your registry in IoT core section as shown in the below screenshot, While you create registry keep in mind few things such as:
Region:
It should be your nearest region in our case which is asia-east1 and then select protocol is MQTT or both based on your requirement. Here we are going to make a communication between device so MQTT protocol is more convenientgcloud supports both MQTT and HTTPOn stack driver logging choose your device logging which you wish to store Gateway Setup in gcloud :
Step1:Clone the Google cloud tutorials code from the git by running the following commandWe can use Raspberry pi or your computer as a gateway for the gateway setup process, Here we are using JWT for authentication, for getting the JWT authentication needed to generate Private and public key pairs.Clone the repository from the Google Cloud community for initial setup for gateway Git clone https://github.com/GoogleCloudPlatform/community.gitGo to the directory of cloud-iot-gateways-rpi Cd community/tutorials/cloud-iot-gateways-rpi
Step 2:Generate the public and private key pair by running the following command ./generate_keys.sh
Step3: Go to the registry tab, click on gateway
Step4: Enter gateway id
Step 5: Allow Gateway communication
Step 6: Add public key by manually or upload
Step 7: Select the public key format in our case which is RS256_X509Step8: Click on create button and let other as it is
Step 9: Modify the run-gateway by the arguments which you provide while you create such as , registry_id and device_id and so on
Step 10: Generate the root certificate by running the following command Wget https://pki.goog./roots.pemYou can create virtual environment in gcloud-IoT core to seperate your projects from your other cloud projects, Follow the below command pip3 install virtualenv virtualenv env source env/bin/activate
Step 11: Install the requirements-gateway.txt by running the following command.Ensure that you are in the directory of the file is requirements-gateway pip3 install -r requirements-gateway.txt
Step 12: Run the gateway code with your modified arguments by following the commandsource run-gatewayDevice Configuration and creation:Create your device in the IoT core section as mentioned in the below screenshot. The next step is ,we need to bind our devices with gateway, create your gateway in the gateway tab as mentioned in the below screenshot. While you create gateway, you may get an error alert saying “invalid key format” ,change it to other format in our case which is:
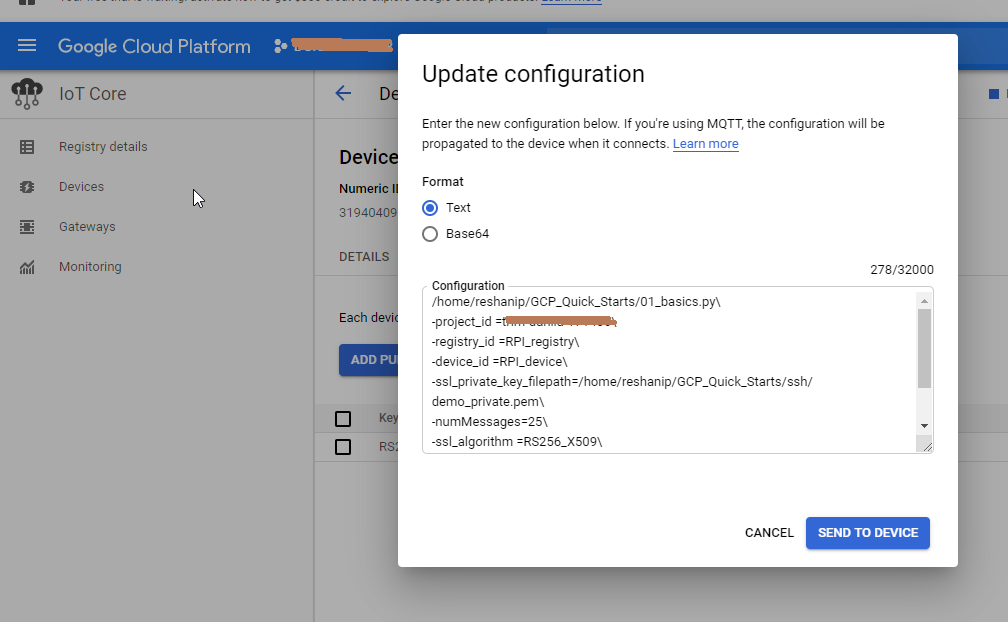
RS256_X509 Device configuration with Raspberry pi to talk with gcloud-IoT core:Go to the device tab, click on the device that you created, click on update configuration and provide the details as shown in the screenshot below.
 Publish and subscribe data on Google Cloud and your gateway device:Publish and subscribe(Pub/sub) is a MQTT protocol, it sends the data like a message bus.Get the IP address of your gateway using ipconfig(windows) or ifconfig (Raspberry pi) for setting up your publish client.
Publish your telemetry data from your gateway
Step 1: Enter your ip address in thermostat.py
Step 2: Make your hardware configuration with raspberry pi
Step 3: To ensure the gateway is running in your raspberry by follow the below commandsource run-thermostat
Step 4: You can see your data in your terminal which published to the MQTT broker after running the above command
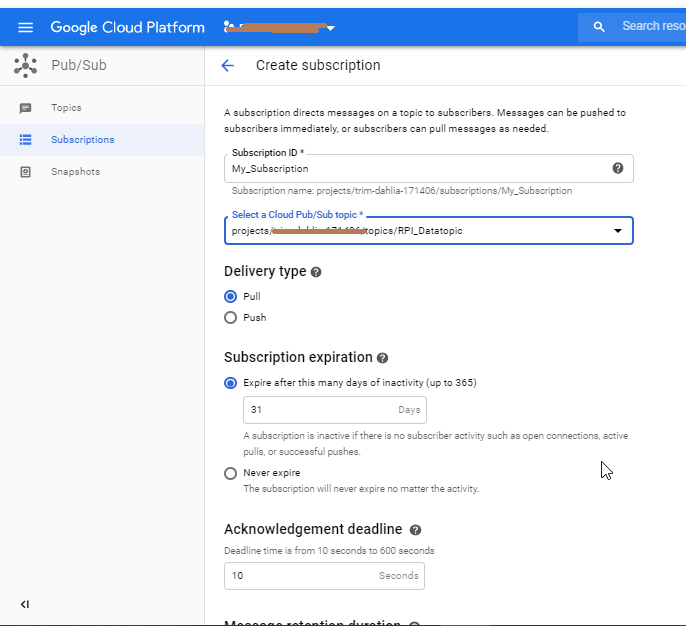
Create subscription and subscribe telemetry data on gcloud:Create Subscription: Search pub/sub in the search box and create a subscription by giving required parameters as mentioned in the screenshot. Here you would need to select the pubsub topic which you created earlier, delivery type is “Pull” as we getting the data from our gateway device (Raspberry pi)  open the gcloud shell terminal and run the followinggcloud pubsub subscriptions pull My subscription –auto-ack –limit=100Finallyyou would be able to can see the data subscribed from the device in gcloud shell terminal if everything is done.

